OpenShift
Prerequisites
- OpenShift cluster with project "xormon" (or any other - need to change namespace in yaml files)
- access to Docker Hub (oficcial docker images are used)
- default StorageClass with autoprovisioning (or specify storage in yaml files)
- OpenShift oc cli tool installed
Sample yaml files custopmization
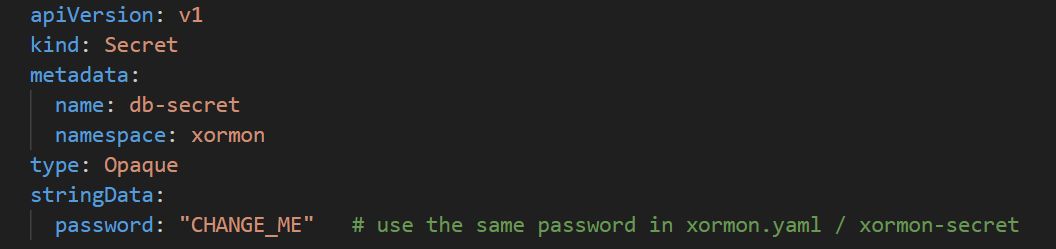
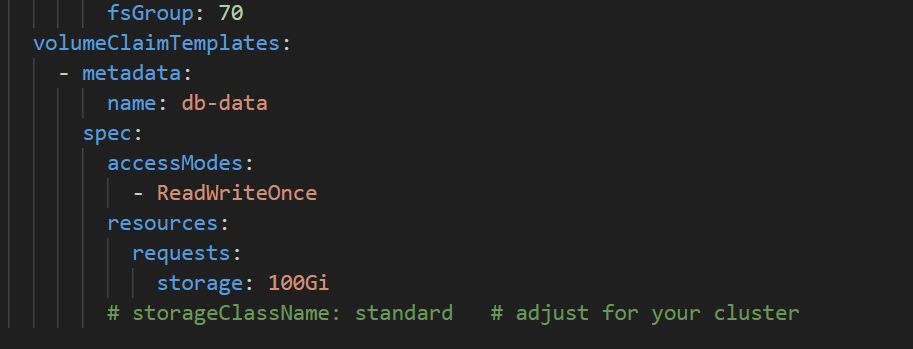
- Customize timescaledb.yaml
- set database password in db-secret - in this example is password "CHANGE_ME"
- use specific timescaledb container image version

- timescaledb parameters can be tuned in args section

- modify storage requirements
- set database password in db-secret - in this example is password "CHANGE_ME"
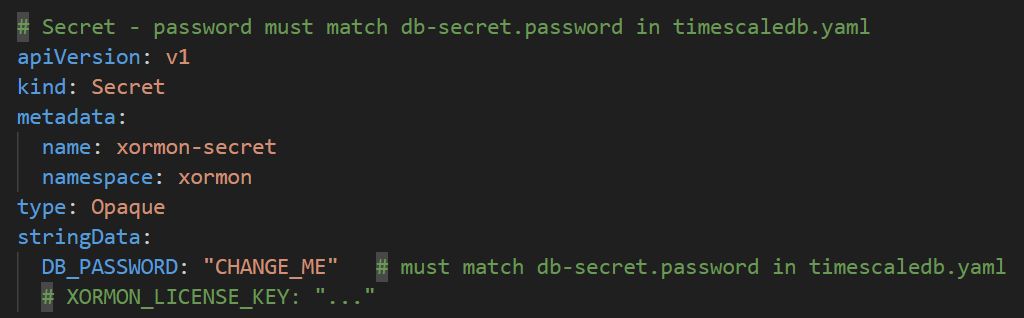
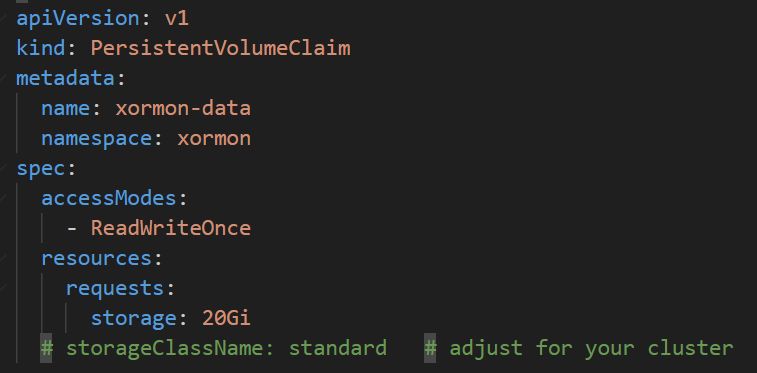
- Customize xormon.yaml
- modify xormon secret - password must be the same as the previously configured
- customize storage, if needed
- customize container image versin

- customize route with hostname or use default

- modify xormon secret - password must be the same as the previously configured
Deployment
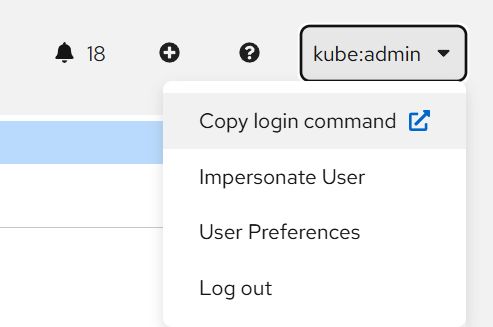
- Once the customization is completed, login to cluster with oc cli command. You can find oc login command in user menu:
- Deploy timescale db and customize ServiceAccount rights:
# deploy DB
$ oc apply -f timescaledb.yaml
  secret/db-secret created
  serviceaccount/timescaledb created
  statefulset.apps/timescaledb created
  service/timescaledb created

# rights to serviceaccount
$ oc adm policy add-scc-to-user anyuid -z timescaledb -n xormon
  clusterrole.rbac.authorization.k8s.io/system:openshift:scc:anyuid added: "timescaledb"
- Wait some time for database pod starts, you can check in web UI or using cli
$ oc get pod -n xormon
 NAME            READY   STATUS    RESTARTS   AGE
 timescaledb-0   1/1     Running   0          110s
- After database is succesfully started, deploy xormon application.
# deploy xormon
$ oc apply -f xormon.yaml
  configmap/xormon-config created
  secret/xormon-secret created
  serviceaccount/xormon created
  persistentvolumeclaim/xormon-data created
  deployment.apps/xormon created
  service/xormon created
  service/xormon-agent created
  route.route.openshift.io/xormon created

# rights to serviceaccount
$ oc adm policy add-scc-to-user anyuid -z xormon -n xormon
  clusterrole.rbac.authorization.k8s.io/system:openshift:scc:anyuid added: "xormon"

# check
$ oc get pod -n xormon
  NAME                      READY   STATUS    RESTARTS   AGE
  timescaledb-0             1/1     Running   0          5m5s
  xormon-7b8f97674d-qrwfx   1/1     Running   0          2m8s
- Wait for xormon application pod starts, it may take longer time.
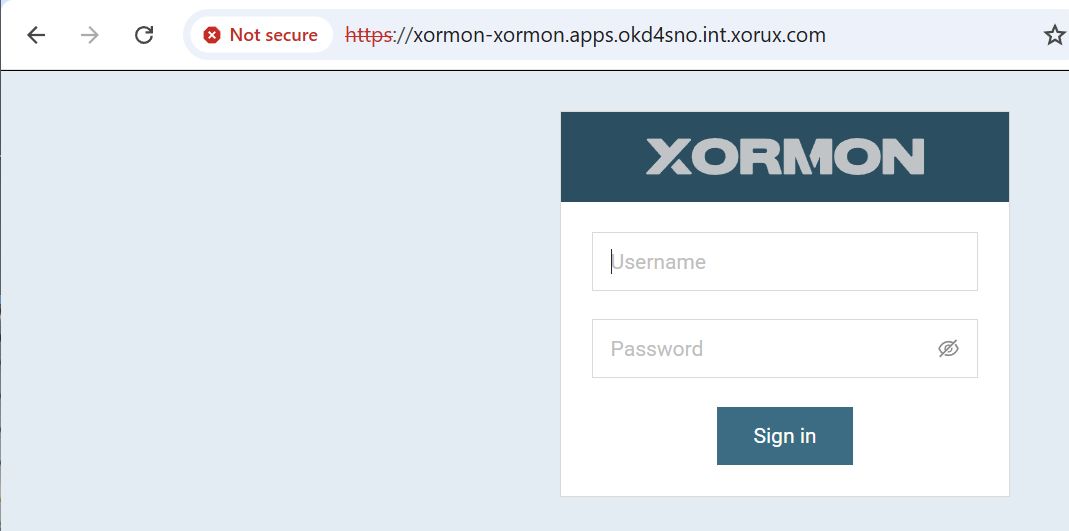
Wait about 5-10 minutes after pod is started and check if xormon is accessible.
This yaml file creates route with default cluster apps domain (can be changed).
- Valid and trusted certificates can be uploaded in application settings.