Backup
- IBM Storage Protect (TSM)
- Cohesity (Veritas) NetBackup
- Veeam ONE
- Veeam B&R
- Cohesity
- Rubrik
- Commvault
Connectivity
-
Allow access from the XorMon host to the Commvault server port 443 TCP.
User creation
-
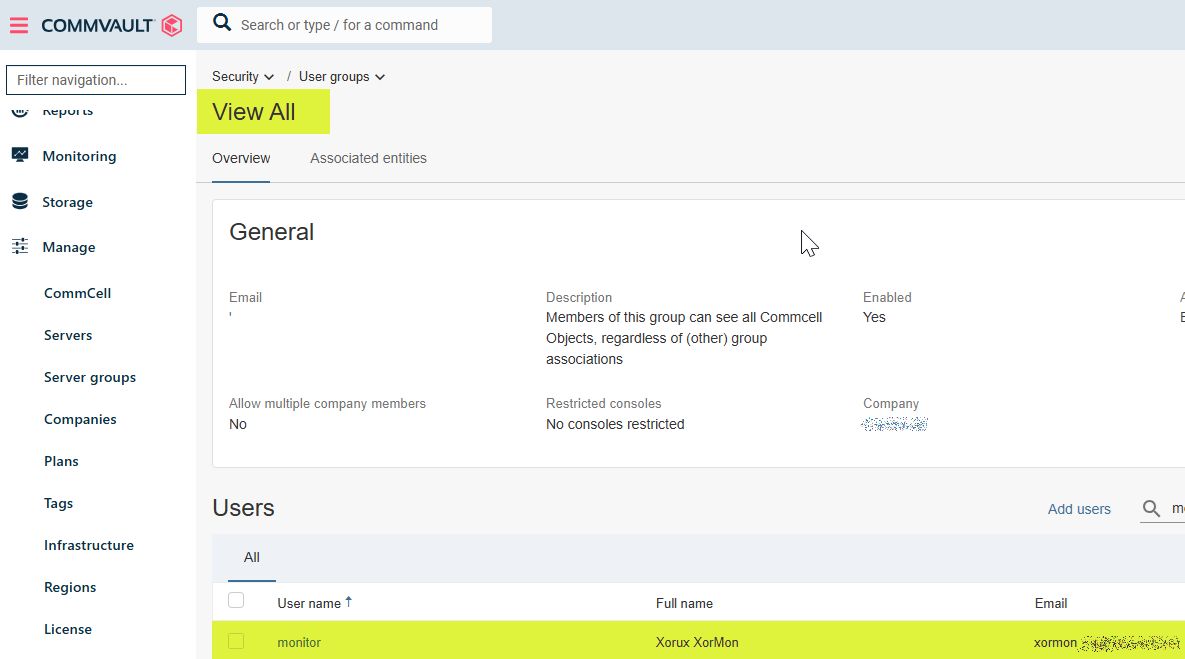
Create user "xormon" under "View All" role.
(below example uses "monitor" user name)
 |
XorMon configuration
-
Add Commvault into configuration from the UI:
XorMon UI: Settings icon ➡ Device ➡Backup ➡ New ➡ Vendor:device ➡ Commvault:
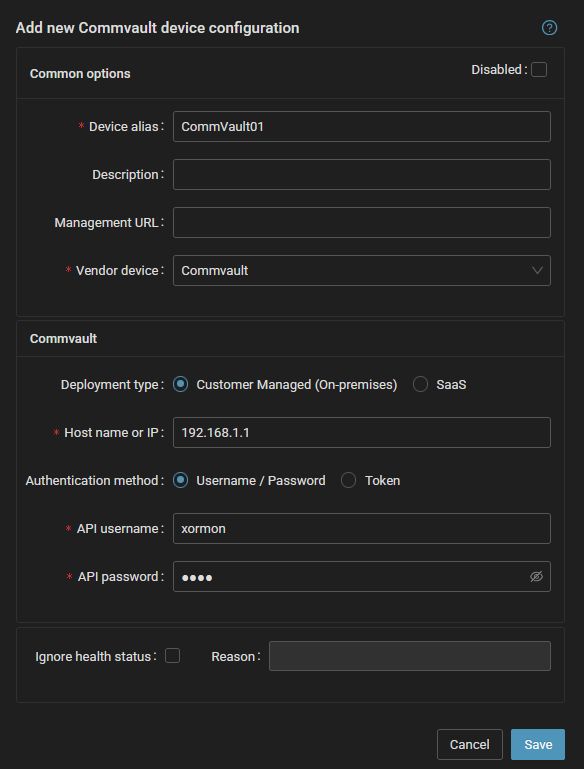
- Run "Test" for configured device, it must show "OK"
-
Wait about 1 hour, then reload the web browser, you should see it in XorMon UI
- Veeam One
- Veeam B&R REST API
Veeam One Community Edition is not supported as it does not have available API.
Connectivity
-
Allow access from the XorMon host to the Veeam One server port 1239 TCP.
User creation
-
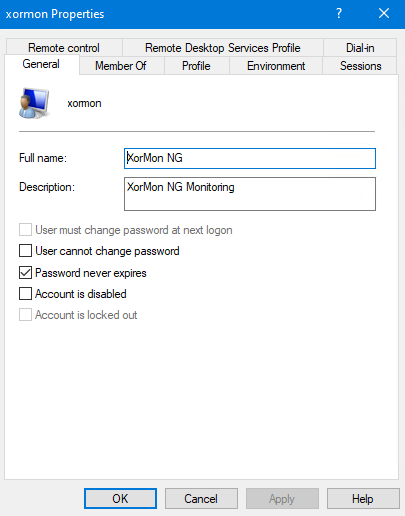
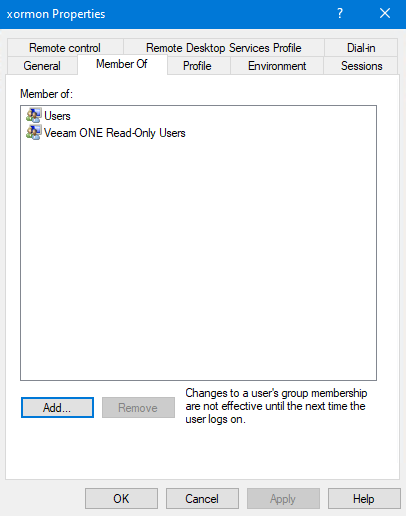
Create standard Windows user "xormon" and add it into the group "Veeam ONE Read-Only Users".
 |
 |
XorMon configuration
-
Add Veeam into configuration from the UI:
XorMon UI: Settings icon ➡ Device ➡Backup ➡ New ➡ Vendor:device ➡ Veeam : Backup & Replication:
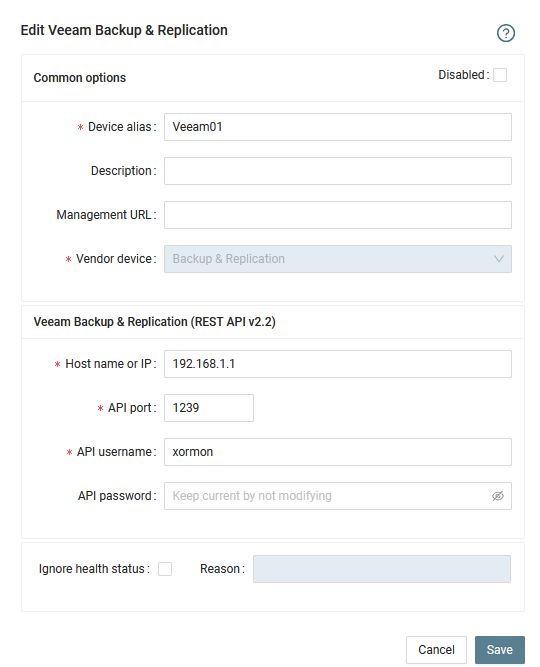
- Run "Test" for configured device, it must show "OK"
-
Wait about 1 hour, then reload the web browser, you should see it in XorMon UI
Supported Cohesity (Veritas) NetBackup versions: 8.2+, 9.0+ and 10.+
Connectivity
-
Allow access from the XorMon host to the Veritas NetBackup Master server port 1556 TCP.
Veritas NetBackup accepts HTTP/HTTPS requests on port 1556 by default.
Create Verias NetBackup user
There are more ways to configure user for XorMon depending on Veritas NetBackup server deployment type (standalone server, virtual appliance), OS (Windows, Linux), version (8.x, 9.0) and authentication authority (Active Directory, local user, Veritas user).Please consult user creation steps with Veritas NetBackup support if in doubt.
Here we describe two ways to create a NetBackup user:
- NetBackup 9.0 with RBAC, Windows server
- NetBackup REST API user without RBAC
NetBackup 9.0, RBAC, Windows server
Veritas NetBackup 9.0, Role Based Access, Windows standalone server with local user, Web Management Console:
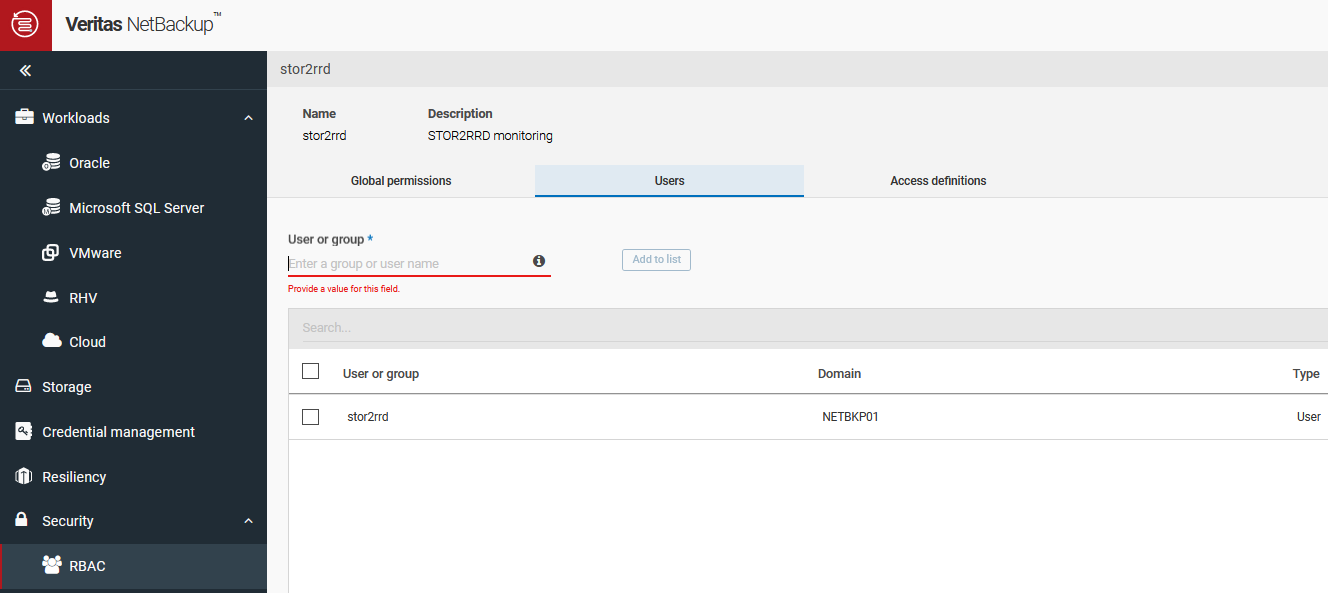
- Log into Veritas NetBackup Master server and create a new local user for XorMon (screenshots show user "stor2rrd" but use "xormon" preferably
- Log into Veritas NetBackup Web Managemet Console as administrator
- Security ➡ RBAC ➡ Roles ➡ +Add (Custom role)
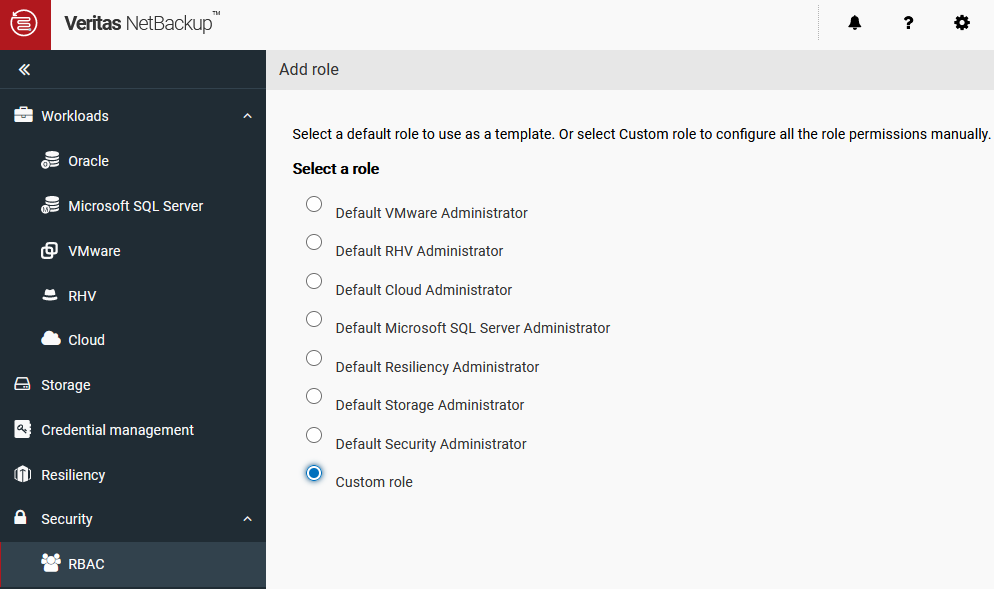
- Assign Role name and description and go to Permissions categories
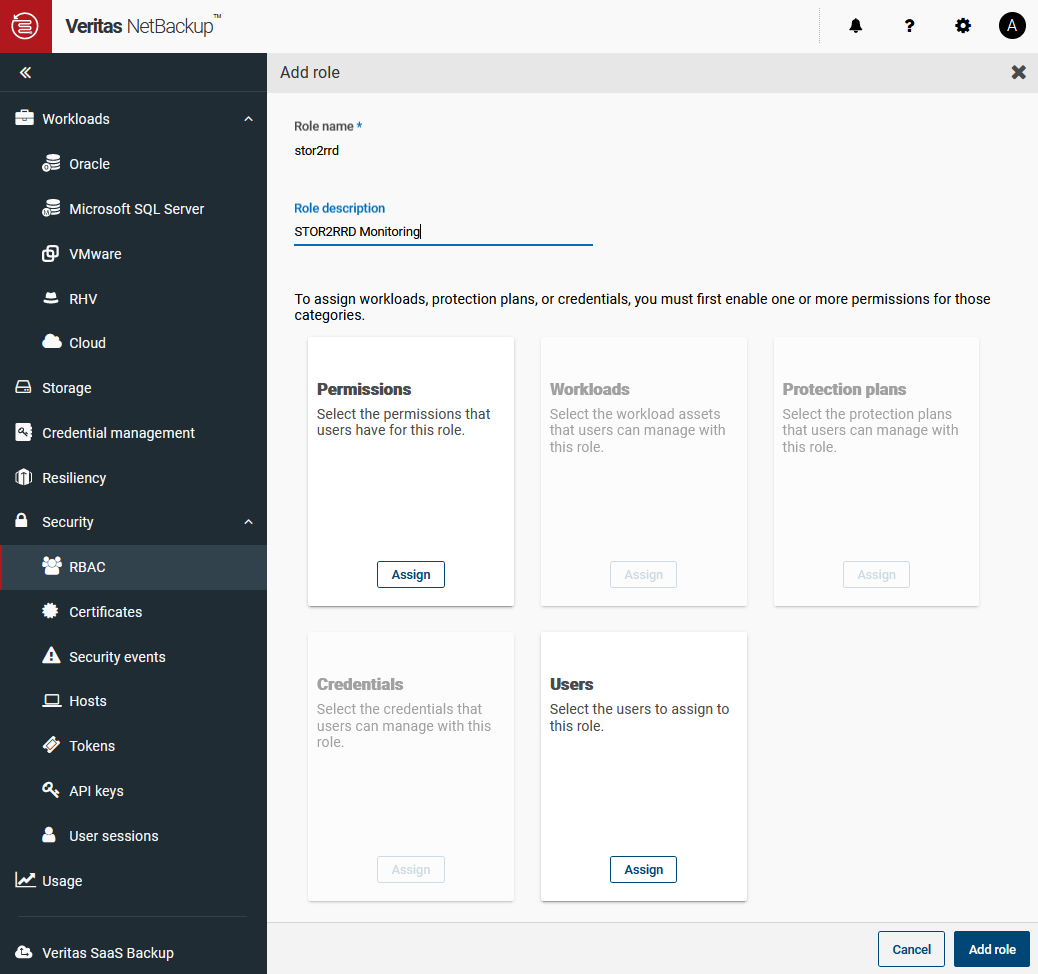
- Assign 'View' permission for the following Global categories and objects
Veritas NetBackup Management:- Event logs
- Event log messages
- Event log notifications
- NetBackup hosts
- Host properties
- NetBackup backup images
- Jobs
- Media server
- Resource limits
- Servers
- Trusted master servers
- Policies
- Storage lifecycle policies
- Cloud storge
- Disk pools
- Storage servers
- Disk Volumes
- Storage units
- Tape devices
- Tape media
- Tape media server groups
- Tape media volume pools
- Replication-capable target storage servers
- Event logs
- Assign the user created in the first step to the new role
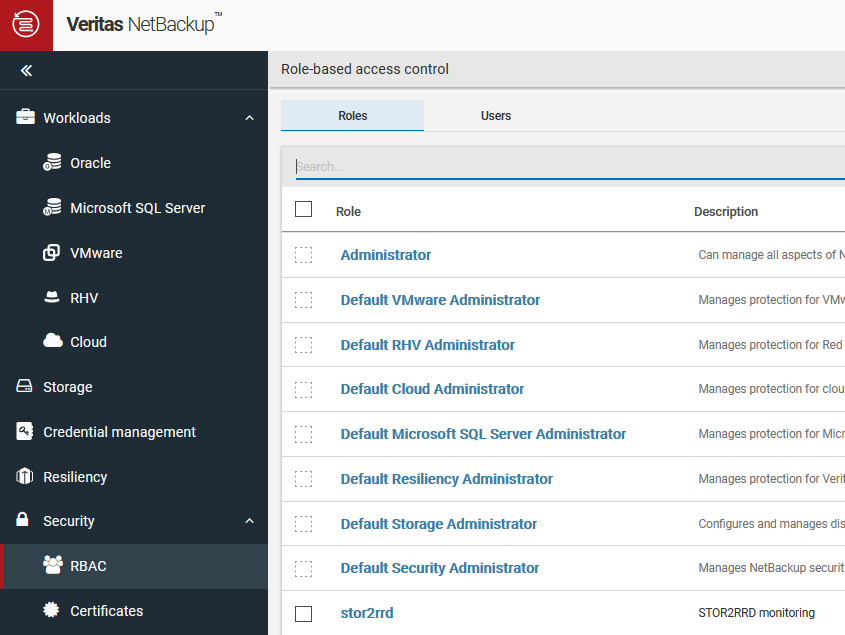
- Recommended optional step: Create Access Key
- Security ➡ Access keys ➡ +Add
- Fill in the name of the user created in the previous steps
- Set key validity
- Click Add
- Copy and save the access key
- Use this access key later when adding NetBackup to XorMon
NetBackup REST API user without RBAC
Use only on older NetBackup versions without RBAC support.
Original KB: 100042908 How to add users for making queries against Veritas NetBackup REST API
- Add VxSS user to the Veritas NetBackup master server in order to perform user/password authentication when using the Veritas NetBackup API
bpnbat command:
bpnbat -AddUser <user> <password> <domain>
The user, password and domain can be any value and do not have any relation to GUI or other login credentials. Make note of the values as they will be needed later.
(VxSS user name and domain name must not confict with other user or domain names used in the environment!)
Example:
bpnbat -AddUser xormon Secret1234 xormon
- Enable enhanced auditing with the following command:
bpnbaz -SetupExAudit
- Give the new VxSS user administrator privileges
bpnbaz -AddUser <domain type>:<domain name>:<user>
Example:
bpnbaz -AddUser vx:xormon:xormon
- It may be necessary to restart NetBackup services.
XorMon configuration
-
Add Veritas NetBackup into configuration from the UI:
XorMon UI: Settings icon ➡ Device ➡Backup ➡ New ➡ Vendor:device ➡ Veritas NetBackup
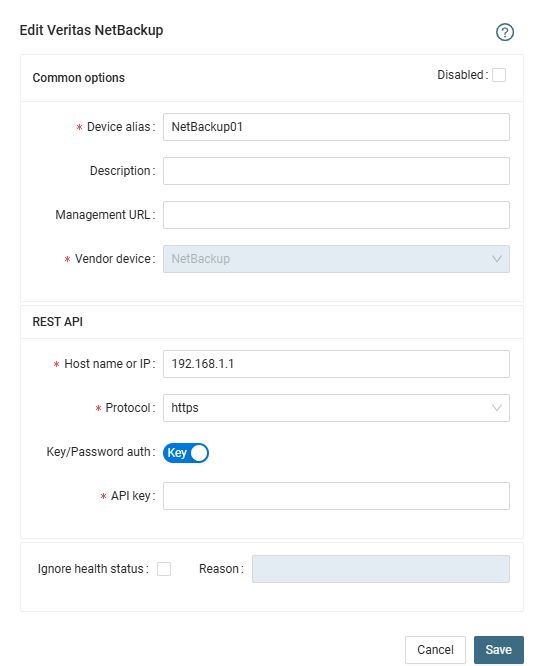
Domain type: vx (Veritas private database), NT (Windows workgroup), ldap (Active Directory), unixpwd (UNIX password file)
- Run "Test" for configured device, it must show "OK"
-
Wait about 1 hour, then reload the web browser, you should see it in XorMon UI
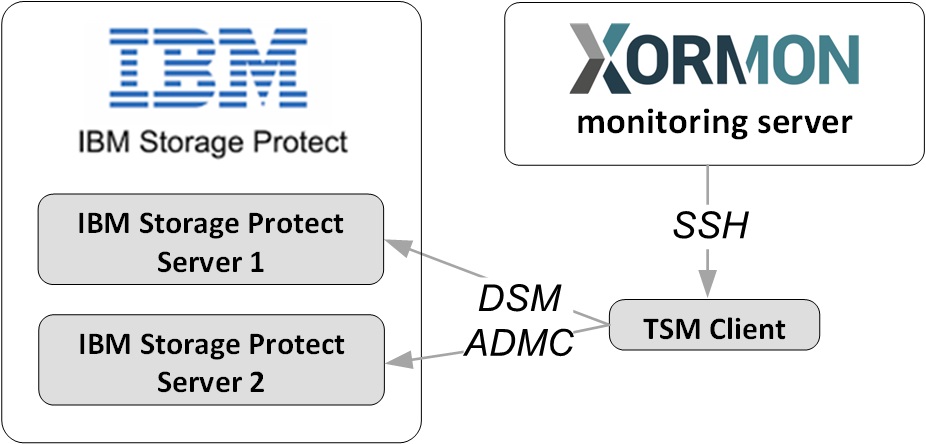
There must be enabled ssh access somewhere where is running the TSM server/client to execute TSM commands.
List of monitored metrics
 |
TSM prerequisites
- Install TSM client and configure it
Open network from the XorMon server to the TSM server port 22 TCP (ssh)
Stanza/servername can be configured in dsm.sys www.ibm.com/docs/en/tsmferp/7.1.3.0?topic=files-client-system-options-file-sample-dsmsys
Example dsm.sys:
SErvername  TSM-server01
  COMMmethod         TCPip
  TCPPort            1500
  TCPServeraddress   192.168.1.1
- Create user xormon with "operator" role
login as administrator into dsmadmcdsmadmc -se=TSM-server01 -id=admin -pass=<password> TSM-server01 > REGister Admin <admin_name> <password> PASSExp=9999 CONtact=“XorMon user“ TSM-server01 > Grant AUTHority <admin_name> CLasses=Operator
XorMon configuration
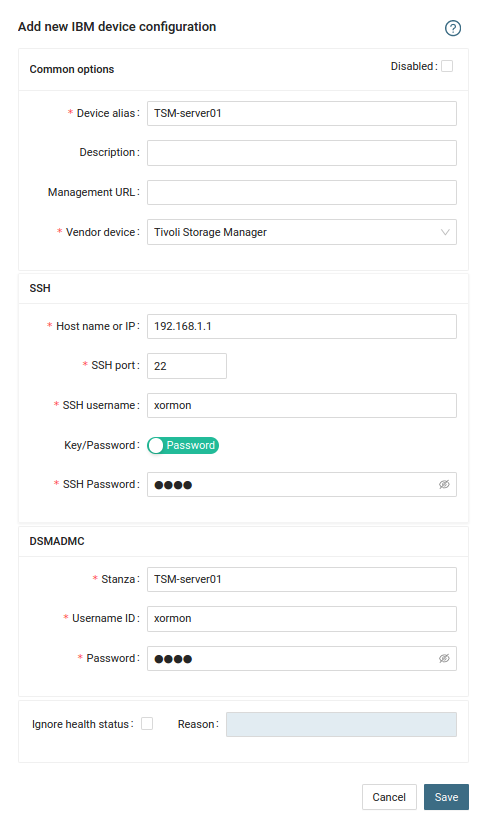
- Add IBM Spectrum Protect into configuration from the UI:
Settings icon ➡ Device ➡ Backup ➡ New ➡ Vendor:device ➡ IBM ➡ Spectrum Protect (TSM)
- Run "Test" for configured device, it must show "OK"
-
Wait about 1 hour, then reload the web browser, you should see it in XorMon UI
- Veeam One
- Veeam B&R REST API
XorMon monitors Veeam Backup & Replication v13 using the native Veeam REST API (revision 1.3-rev1).
Supported product: Veeam Backup & Replication 13.0+ (REST API revision 1.3-rev1 or newer).
Veeam 13 Enterprise Plus license is required to enable API support is necessary.
Reference: Veeam B&R 13 REST API — Overview
Connectivity
- Allow access from the XorMon host to the Veeam Backup & Replication server port 9419 TCP (HTTPS).
- If a non-default REST API port was configured during VBR installation, use that port instead.
Reference: Veeam Backup & Replication ports, REST API service port
User creation
Create a dedicated Windows local or Active Directory user (recommended name: xormon) and assign the built-in Veeam role Veeam Backup Viewer.
Step 1 — Create the Windows user
- Create a standard Windows local user or AD user, for example xormon.
Step 2 — Add the user in Veeam Backup & Replication console
- From the main menu, select Users & Roles > Security.
- Click Add.
- In the Type field, select User or Group.
- In the User or group field, enter the account name, for example [email protected].
- From the Role list, select Veeam Backup Viewer.
- Click OK.
Step 3 — Disable MFA for the service account
REST API authentication uses username and password. MFA must be disabled for the monitoring account.
- Go to Users & Roles > Security.
- Select the xormon user and click Edit.
- Select This is a service account (disables two-factor authentication).
- Click OK.
Recommended role: Veeam Backup Viewer (read-only access to jobs, sessions, backups, repositories and infrastructure via REST API).
Do not use Veeam Backup Administrator unless required — that role grants full administrative access.
Custom roles (RBAC v13) are not supported for REST API authentication — use built-in roles only.
Reference: Adding users in VBR console, Adding users in VBR web UI, Veeam built-in roles, Disabling MFA for service accounts
Verify API connectivity (optional)
Obtain OAuth2 access token:
curl -k -X POST "https://<vbr-hostname>:9419/api/oauth2/token" \
  -H "x-api-version: 1.3-rev1" \
  -H "Content-Type: application/x-www-form-urlencoded" \
  -d "grant_type=password&username=<user>&password=<password>"
Query sessions:
curl -k "https://<vbr-hostname>:9419/api/v1/sessions?limit=1" \
  -H "x-api-version: 1.3-rev1" \
  -H "Authorization: Bearer <access_token>"
Successful response is HTTP 200. HTTP 401 means invalid credentials or MFA enabled. HTTP 403 means insufficient role permissions.
VBR uses a self-signed TLS certificate on port 9419 by default. XorMon must trust the backup server certificate.
Reference: REST API authorization, Get Access Token, Get All Sessions, TLS certificate
XorMon configuration
-
Add Veeam into configuration from the UI:
XorMon UI: Settings icon ➡ Device ➡Backup ➡ New ➡ Vendor:device ➡ Veeam : Backup & Replication:
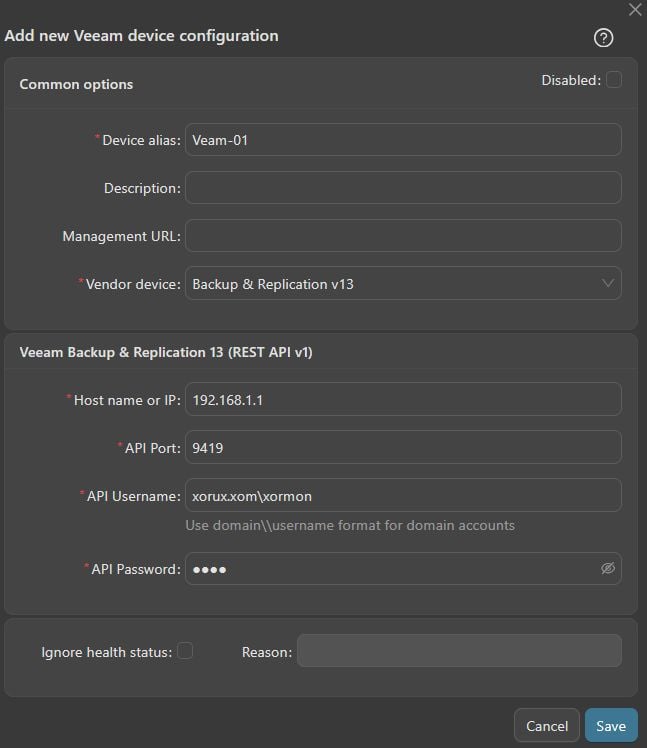
Enter VBR server hostname or IP address and REST API port (default 9419).
Enter monitoring user credentials (xormon / password).
- Run "Test" for configured device, it must show "OK"
-
Wait about 1 hour, then reload the web browser, you should see it in XorMon UI